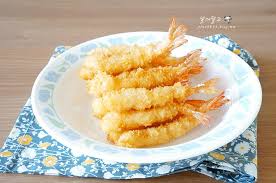
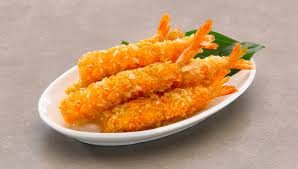
Tempura is one of Japan’s most iconic dishes—light, crispy, and golden perfection that melts in your mouth while still offering that delicate crunch. Whether it’s shrimp tempura (ebi tempura), assorted vegetables, or even creative fillings like mushrooms or lotus root, tempura is an art that’s surprisingly approachable at home when you follow the right steps.
In this blog, we’ll walk you through everything you need to know about making tempura at home, from the history and essential ingredients to the detailed, step-by-step instructions and pro tips to ensure a restaurant-quality result in your kitchen.
🌏 A Brief History of Tempura
Tempura might be synonymous with Japanese cuisine today, but its roots are actually European. Portuguese missionaries and traders introduced the technique of frying food in batter to Japan in the 16th century. The word “tempura” is believed to come from the Latin “tempora”, referring to Lent, during which meat is avoided and fried fish or vegetables were common.
The Japanese embraced the method and transformed it into their own culinary expression. Unlike the heavier batters used in Western cooking, Japanese tempura is light and delicate, emphasizing freshness, texture, and seasonality.
🧾 Essential Ingredients for Perfect Tempura
To get started, you’ll need a few key ingredients:
For the Batter:
- 1 cup all-purpose flour
- ½ cup cornstarch
- ½ teaspoon baking powder
- A pinch of salt
- 1 egg yolk (optional, for richness)
- 1 cup ice-cold sparkling water or ice water
For the Filling:
- Shrimp (peeled and deveined, tails left on)
- Vegetables such as:
- Sweet potato (thinly sliced)
- Carrots (julienned)
- Zucchini or eggplant (thin slices)
- Bell peppers
- Mushrooms
- Onions
- Broccoli or green beans
For Frying:
- Neutral oil like vegetable oil, canola, or grapeseed oil
For Dipping Sauce (Tentsuyu):
- ¼ cup soy sauce
- ¼ cup mirin
- ¼ cup dashi or water
- 1 teaspoon sugar
- Grated daikon (optional)
👨🍳 Step-by-Step Tempura Cooking Guide
🔹 Step 1: Prep the Ingredients
Start by washing and slicing all vegetables into uniform, bite-sized pieces. This ensures even cooking. Peel and devein the shrimp, keeping tails on for presentation. Pat all ingredients completely dry with a paper towel—excess moisture causes splattering in hot oil.
You can store the prepped ingredients in the fridge to keep them cool, which also helps with crispiness when frying.
🔹 Step 2: Make the Batter
Cold is king when it comes to tempura batter. Use ice water or ice-cold sparkling water. The batter should be made just before frying, not ahead of time.
- In a large bowl, sift the flour, cornstarch, baking powder, and salt.
- In another bowl, mix the cold water and egg yolk (if using).
- Pour the liquid into the dry mix and stir gently with chopsticks or a fork. Do not overmix—the batter should be slightly lumpy. Overmixing activates the gluten, which leads to a chewy texture instead of light crispiness.
🔹 Step 3: Heat the Oil
Pour oil into a deep frying pan or pot, filling about 2–3 inches deep. Heat the oil to 340–360°F (170–180°C).
You can test the oil by dropping a bit of batter in. If it immediately sizzles and floats, it’s ready.
🔹 Step 4: Fry the Tempura
Fry in small batches to maintain oil temperature.
- Lightly coat each piece in dry flour before dipping it in the batter. This helps the batter stick better.
- Dip into the batter and immediately place into the oil.
- Do not overcrowd the pan.
- Fry shrimp for 2–3 minutes, vegetables for 3–4 minutes.
- Use tongs or chopsticks to turn for even browning.
- Remove and place on a wire rack or paper towels to drain excess oil.
🔹 Step 5: Prepare the Dipping Sauce
In a saucepan, combine soy sauce, mirin, dashi, and sugar. Simmer for a few minutes until flavors combine. Add grated daikon before serving if you like an extra fresh touch.
✨ Pro Tips for Restaurant-Style Tempura
- Use cold batter – Cold slows gluten formation and keeps the batter from absorbing oil.
- Minimal mixing – Lumpy batter = crispy texture.
- Keep fillings dry and cold – This reduces steam and oil splatter.
- Oil temperature control – Use a thermometer to keep temperature consistent.
- Serve immediately – Tempura is best enjoyed hot and crisp. If you must wait, use a warm oven (not microwave!) to keep them crisp.
🍚 Serving Suggestions
Tempura is versatile and can be served in multiple delicious ways:
- With rice: A classic “Tempura Donburi” (Tempura Bowl) includes shrimp and vegetables over steamed rice with sauce.
- With soba or udon noodles: Serve on the side of cold or hot noodles.
- As a starter or party food: Pair with soy dipping sauces or spicy mayo.
- In bento boxes: Add to Japanese lunchboxes for variety and crunch.
🥢 Creative Tempura Variations
Feeling experimental? Try these:
- Seaweed Tempura: Nori strips lightly battered.
- Cheese Tempura: Cubes of mozzarella or cream cheese.
- Fruit Tempura: Apple or banana for a sweet treat.
- Herbs & flowers: Edible flowers or shiso leaves give beautiful results.
🧼 Clean-Up and Oil Disposal
After frying, allow the oil to cool completely. Strain and store for reuse if it’s still clean (up to 2 times). Otherwise, dispose of oil properly—never pour it down the drain!
🌟 Why Make Tempura at Home?
Making tempura at home isn’t just about the food—it’s about the experience. You get to:
- Choose your favorite ingredients.
- Customize the batter and flavors.
- Share a beautiful, interactive meal with family or guests.
Tempura also pairs wonderfully with sake, green tea, or a light beer, making it a perfect dinner party menu.
📝 Final Thoughts
Tempura is a dish that combines technique with creativity. With a bit of practice, you’ll find that this crispy treat is not only easy to make at home but also incredibly satisfying. Whether you’re looking to recreate a taste of Japan or simply try something new, this step-by-step guide to making tempura will help you achieve golden, crunchy perfection every time.
So heat up that oil, chill your batter, and get ready to tempura-fy your kitchen! 🍤✨


